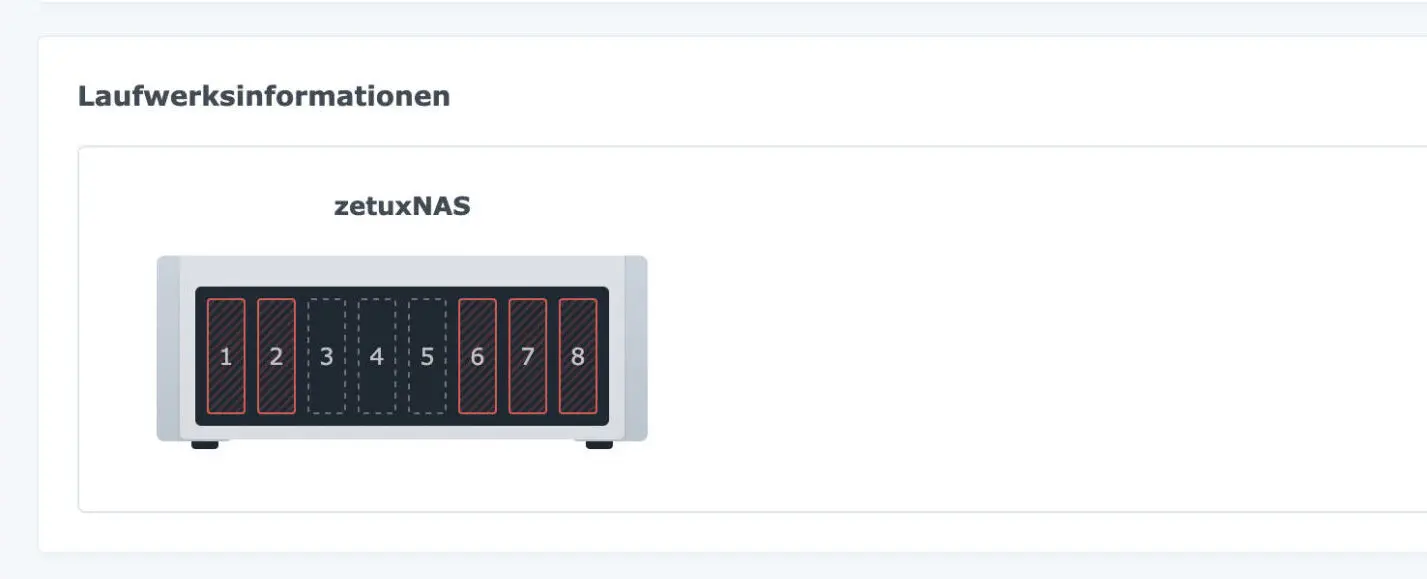
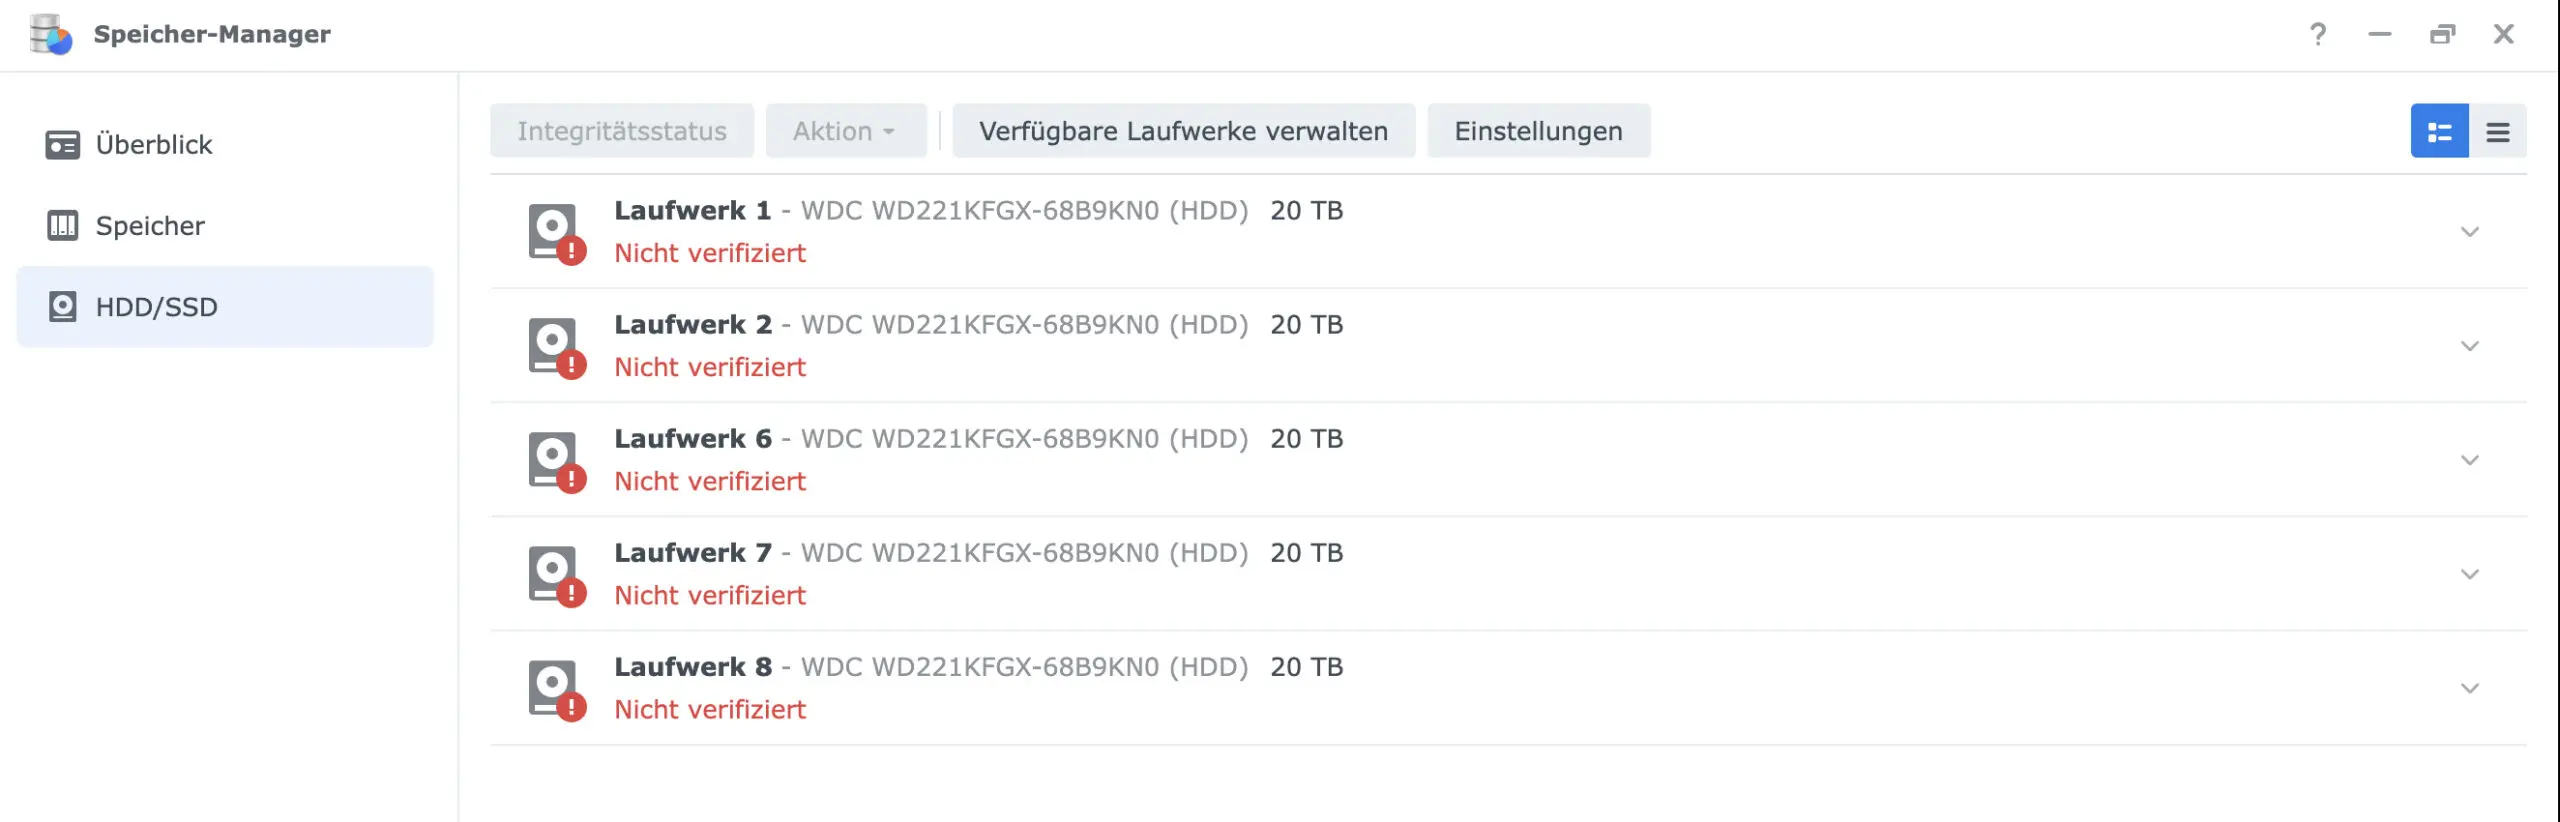
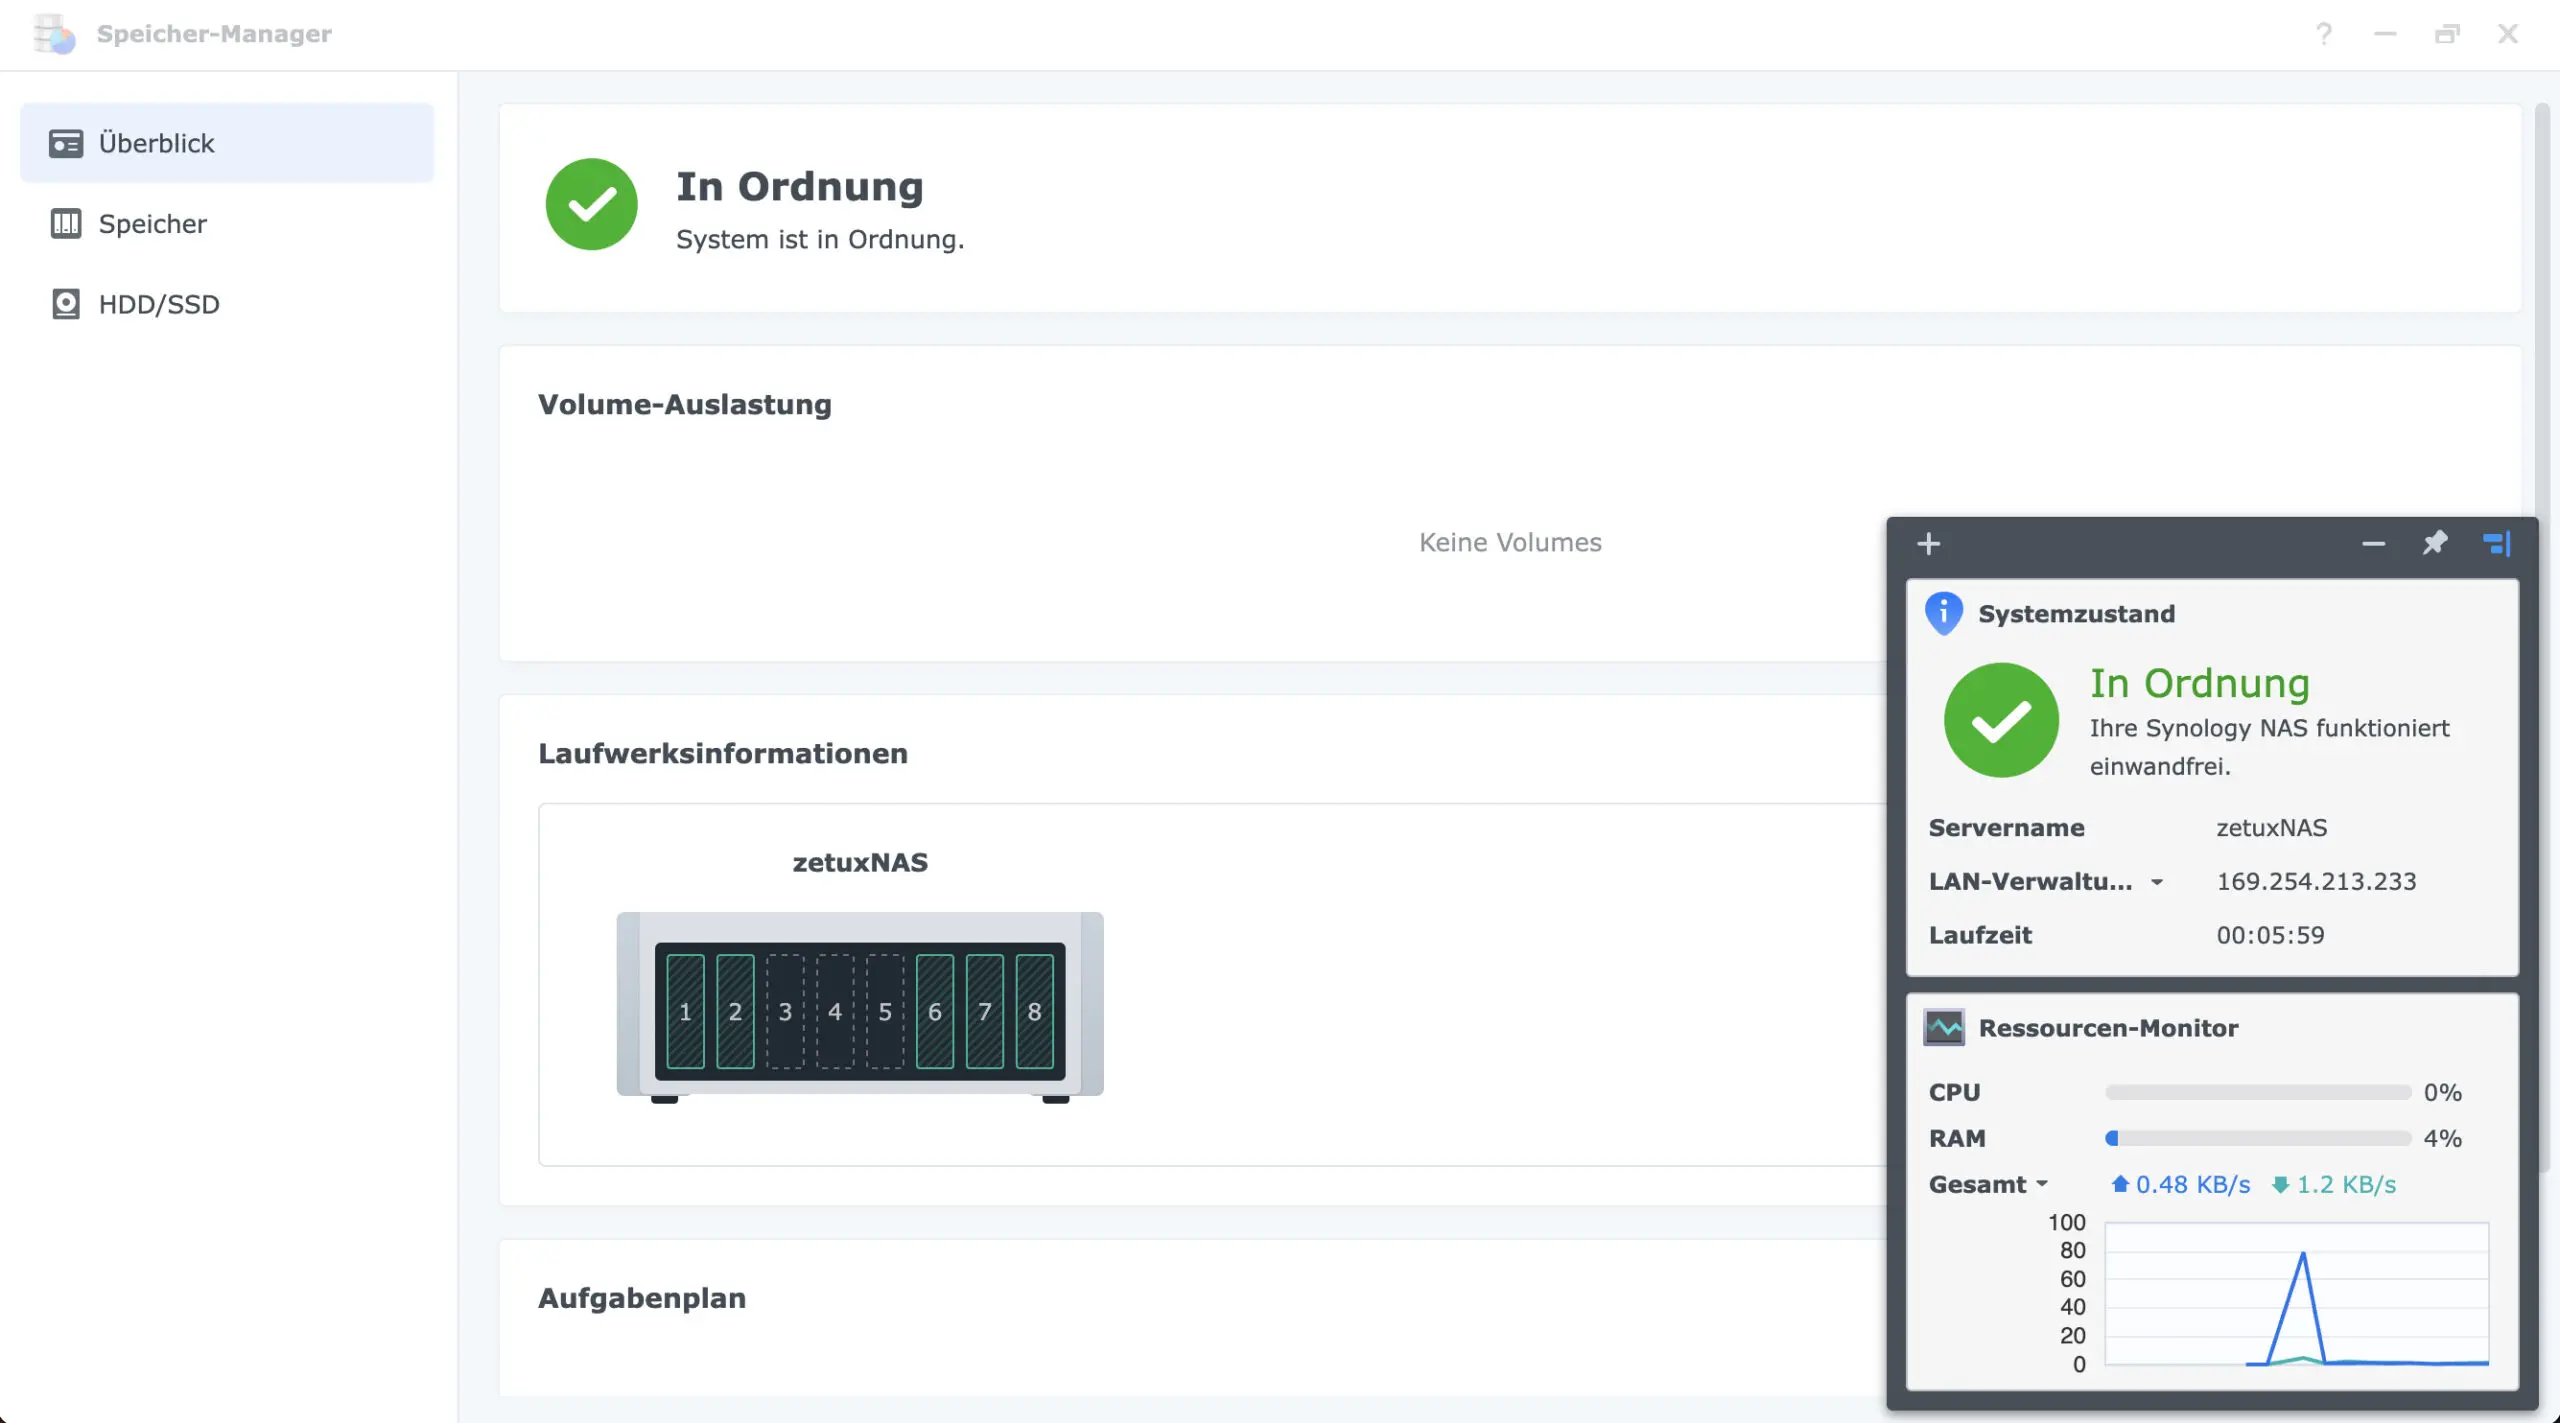
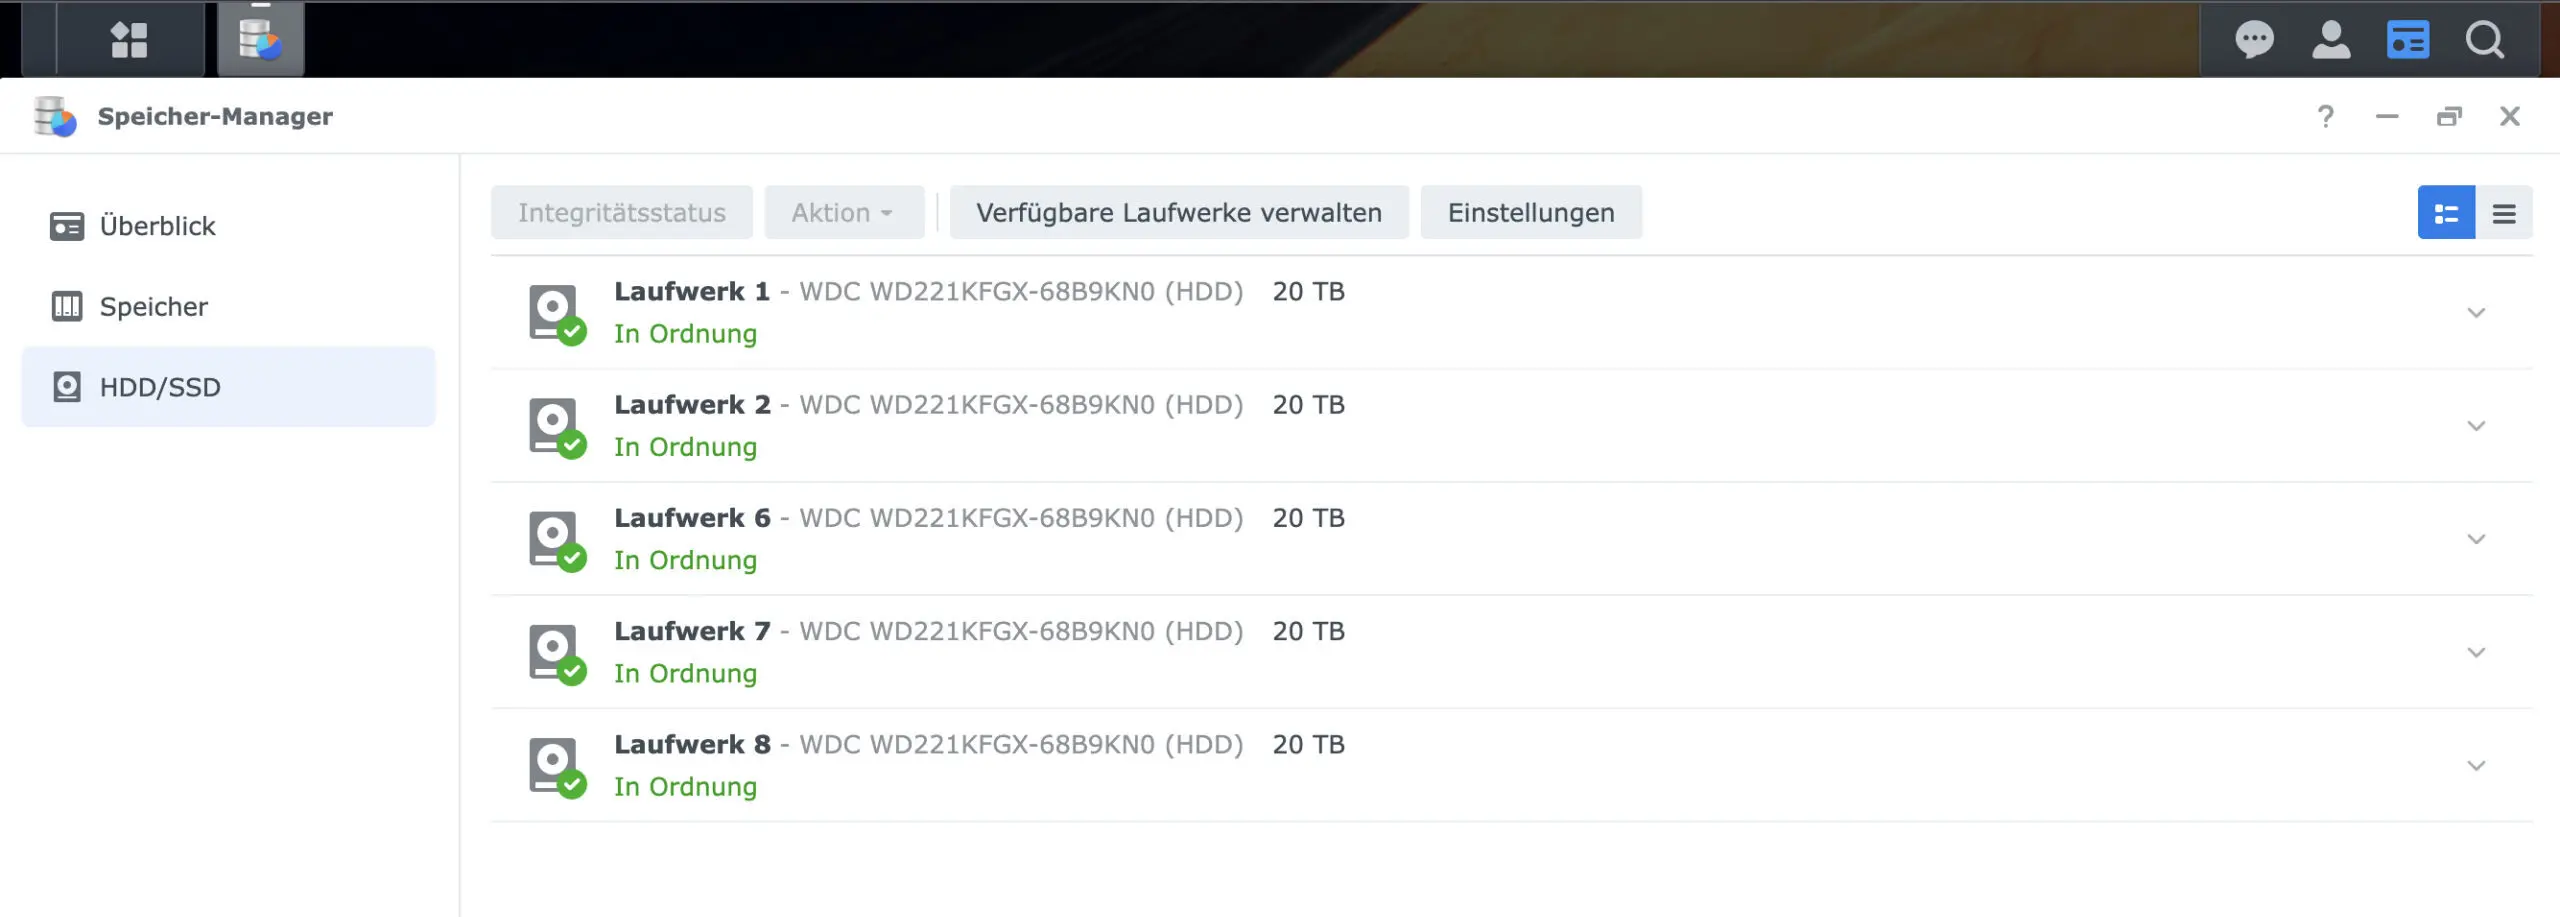
Since the introduction of Synology's own hard drives in 2021, the Owners of Enterprise models manufactured after the end of 2021 have encountered a disc compatibility issue. This problem manifests itself, for example, in the use of WD Red Pro or Seagate Ironwolf HDDs in one "Not verified" message. In general, the following applies to these models from now on, provided hard drives are used not from Synology this warning is displayed. (See Synology compatibility list)
In this blog post, we will take a closer look at the problem and present a simple solution that can be implemented by making adjustments to the configuration files /etc/synoinfo.conf and /etc.defaults/synoinfo.conf can be achieved.
Cause of the Synology disc compatibility problem
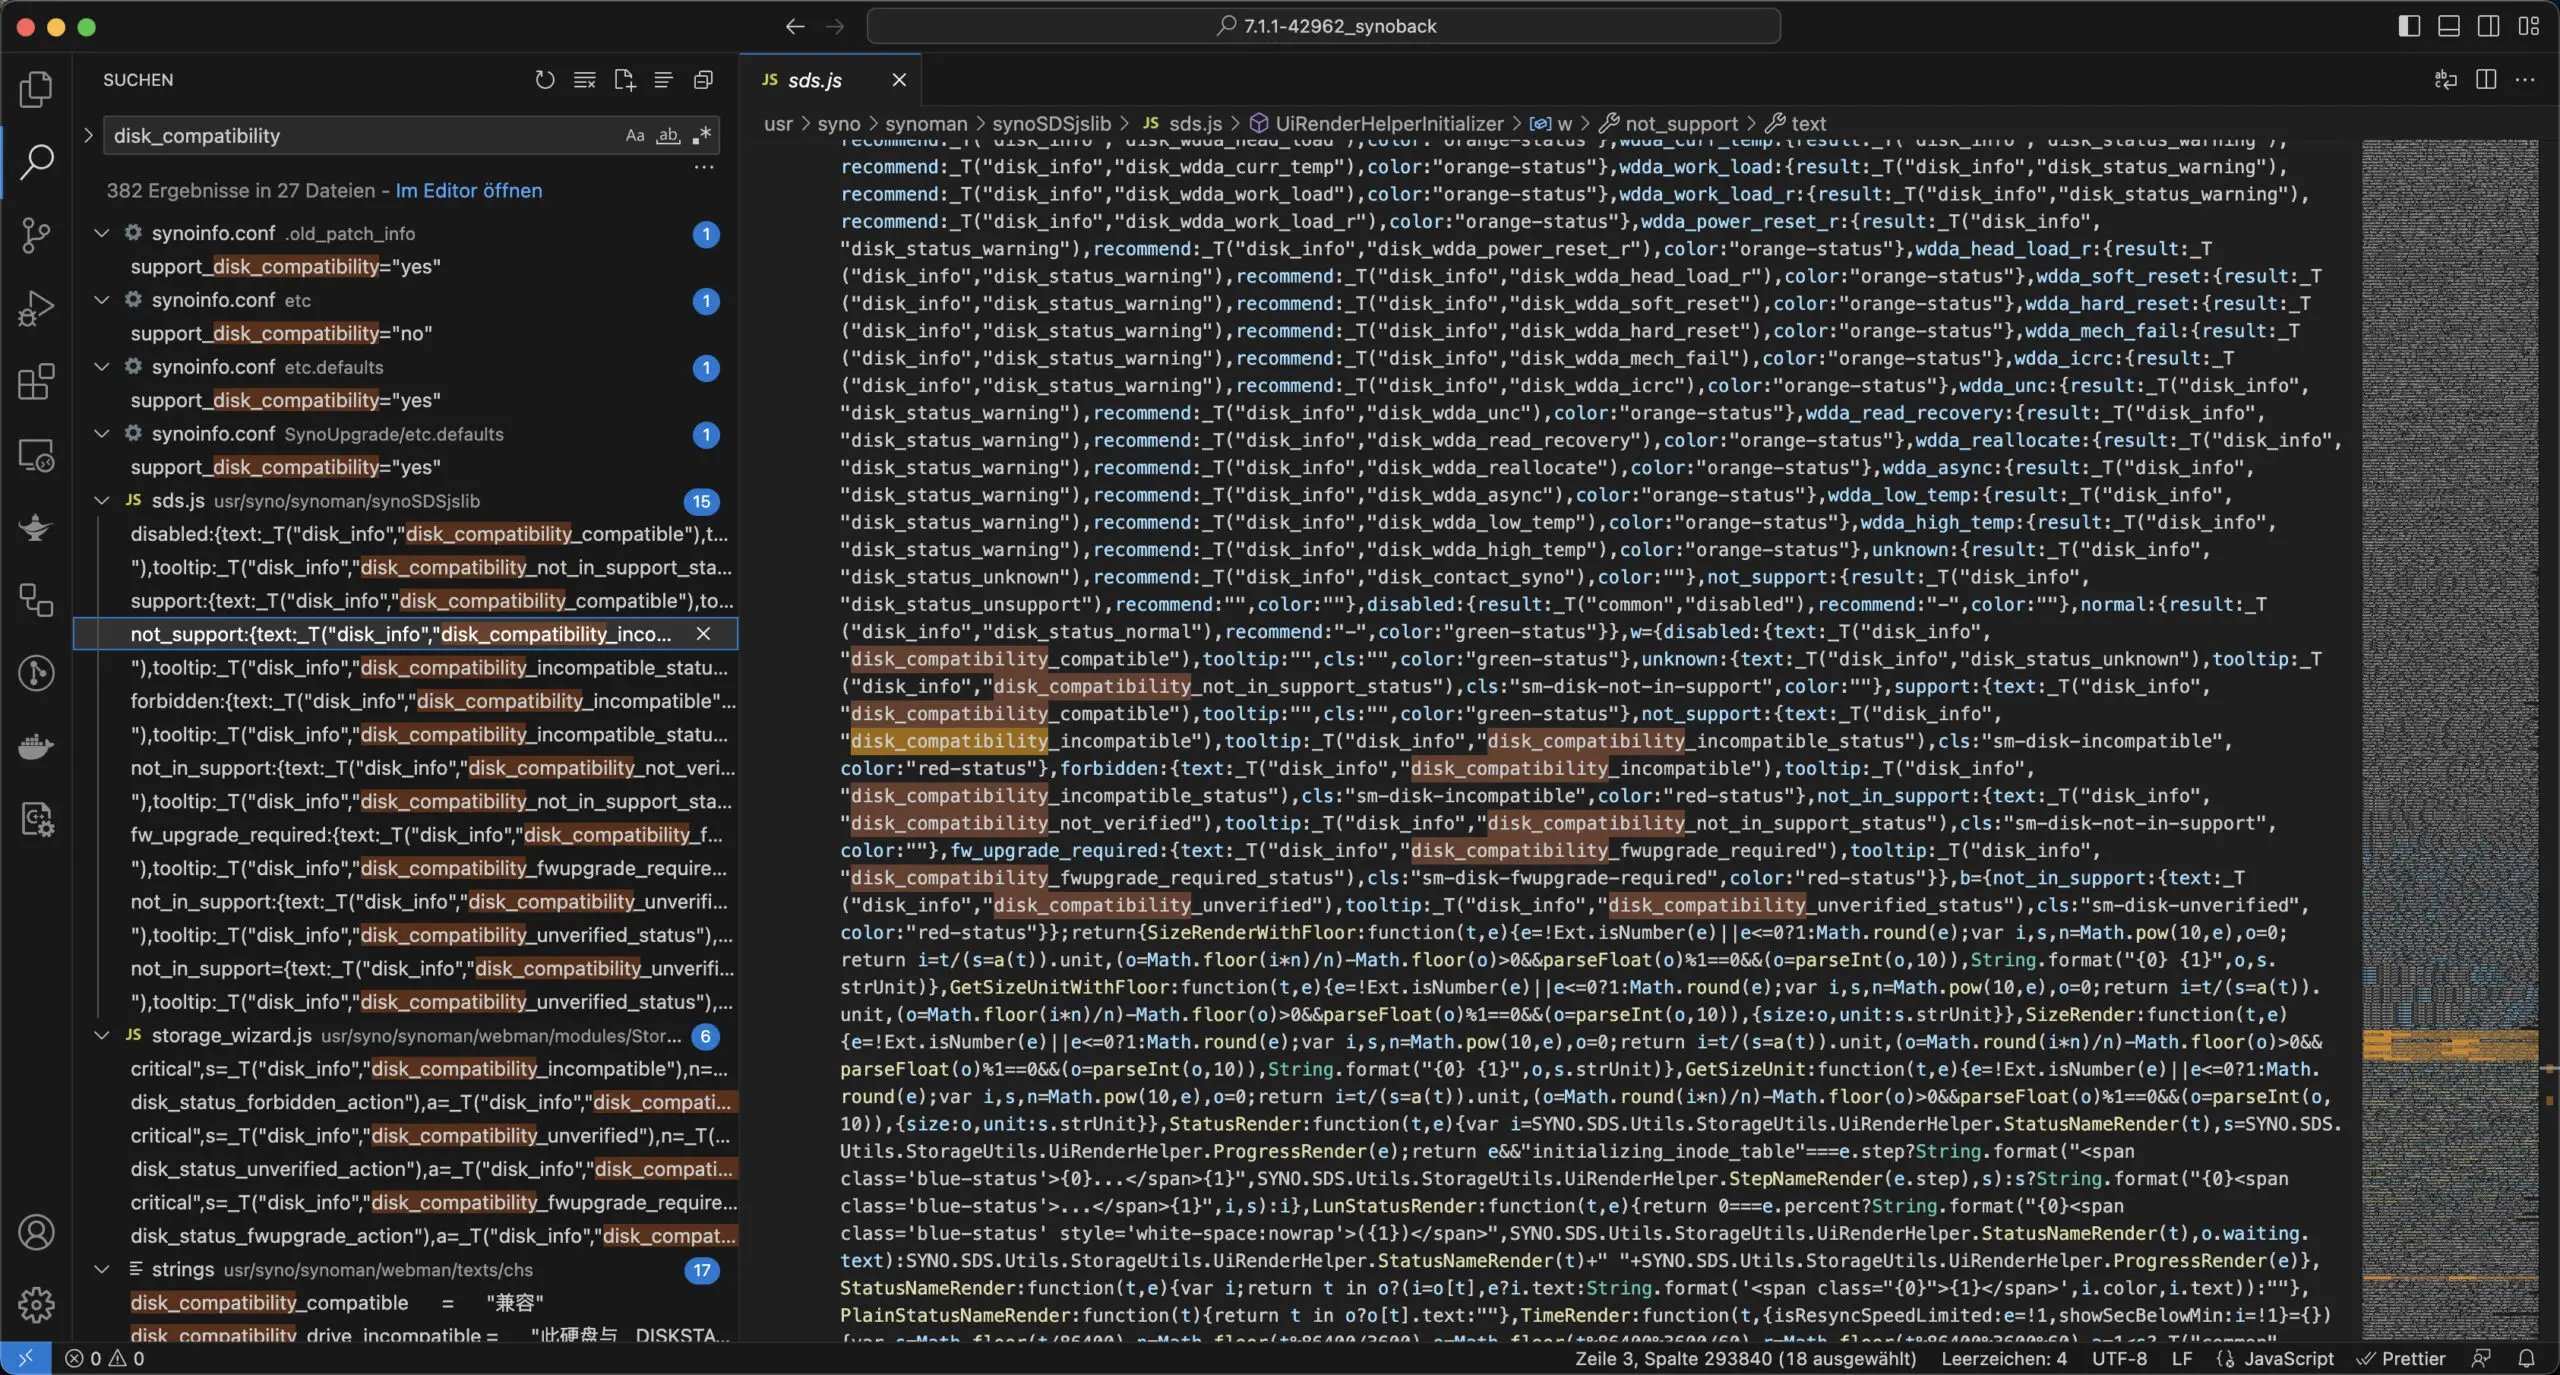
In a nutshell: Synology wants to sell its own discs with its NAS solutions. However, to understand the cause of the disc compatibility problem, which only occurs on new modelswe have the Source code of a Synology DiskStation from 2017 with the latest firmware version (7.2-64570 Update 3) and the Source code of a DiskStation from the year 2023 with the same firmware (7.2-64570 Update 3) in a local git project created by us with git diff compared.
One specific parameter caught our eye: support_disk_compatibility. This parameter influences the detection and validation of hard disks and also controls all warnings and the constant alerting of non-Synology hard disks via e-mail that they should be replaced.
Step-by-step guide to a sustainable solution to the problem
Activate SSH access
Before you can make changes to the two relevant configuration files, you must enable SSH access on your Synology DiskStation.
You can proceed as follows:
- Log in to the web interface of your DiskStation with Administrator rights.
- Go to "System control" > "Terminal & SNMP" > Tab "Terminal«.
- Activate the option "Activate SSH service" and click on "Save«.
Log in with Putty
To access your DiskStation via SSH, use a tool such as Putty and then proceed as follows:
- Start Putty and enter the IP address of your DiskStation in.
- Select "SSH" as Connection type and click on "Open«.
- Enter your User names and your password of your Synology administrator account to verify yourself.
- By entering
sudo -iand the renewed password confirmation they obtain the required extended authorisations.

Make changes to the configuration files
After you have logged in to your DiskStation via SSH and have the extended authorisations (root), follow the steps below to make the necessary adjustments:
Edit both of the following files one after the other:
/etc/synoinfo.conf(Currently loaded configuration) and the/etc.defaults/synoinfo.conf(Default configuration that can and may be applied to your system after upgrades)
Carry out the following instructions once for the first and second file. Start with the number 1 - the editing of /etc.defaults/synoinfo.conf.
vim /etc.defaults/synoinfo.conf
vim /etc/synoinfo.conf- Search for the line
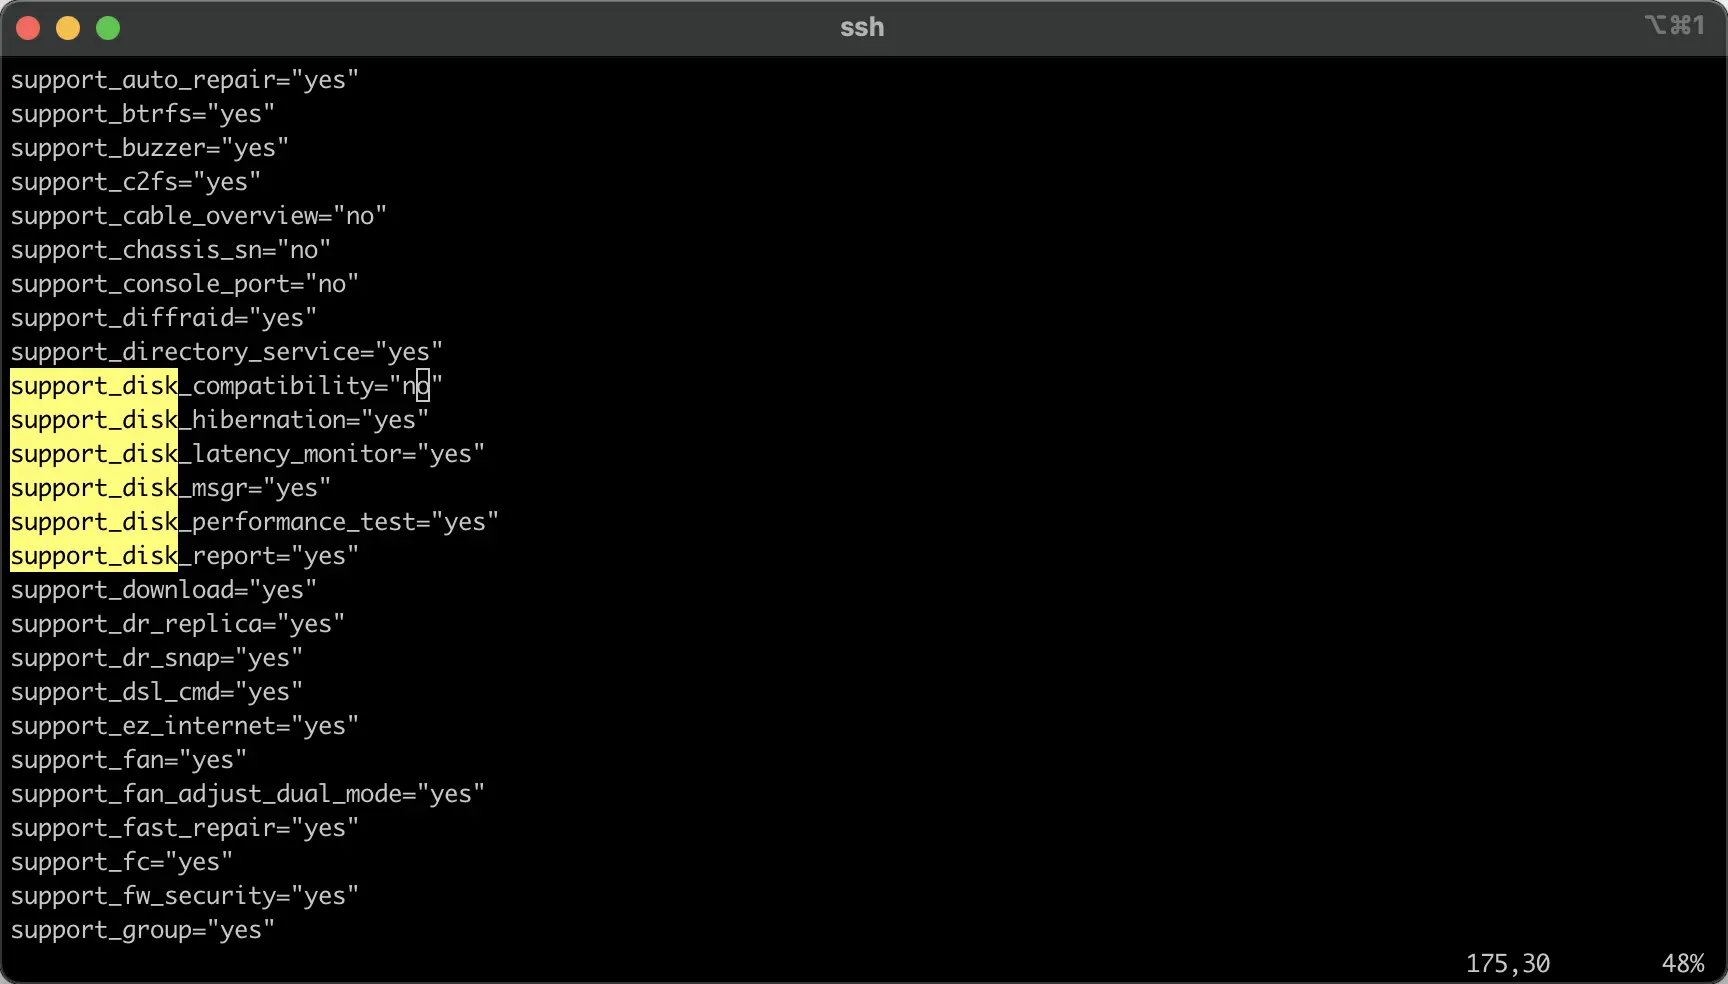
support_disk_compatibilityby entering :/disk_cand ENTER. - The Change value You then from
yesonno.
TipNavigate in the vim editor using the arrow keys. To change something, the Input mode by pressing the Button i be changed.
- To the Exiting the input modepress
Escthen enter:wqand press "ENTER" to save the changes and exit the editor. - Now make the same change for the currently loaded configuration:
/etc/synoinfo.confand save them as before.
Restart the system and be happy! 🙂
After you have made the changes in both configuration files, it is time to restart your DiskStation. To do this easiest via DSM, Web UI or alternatively by the command reboot in Putty.
After restarting the system, the discs are now accepted correctly and as standard on older models.
Additional automation option
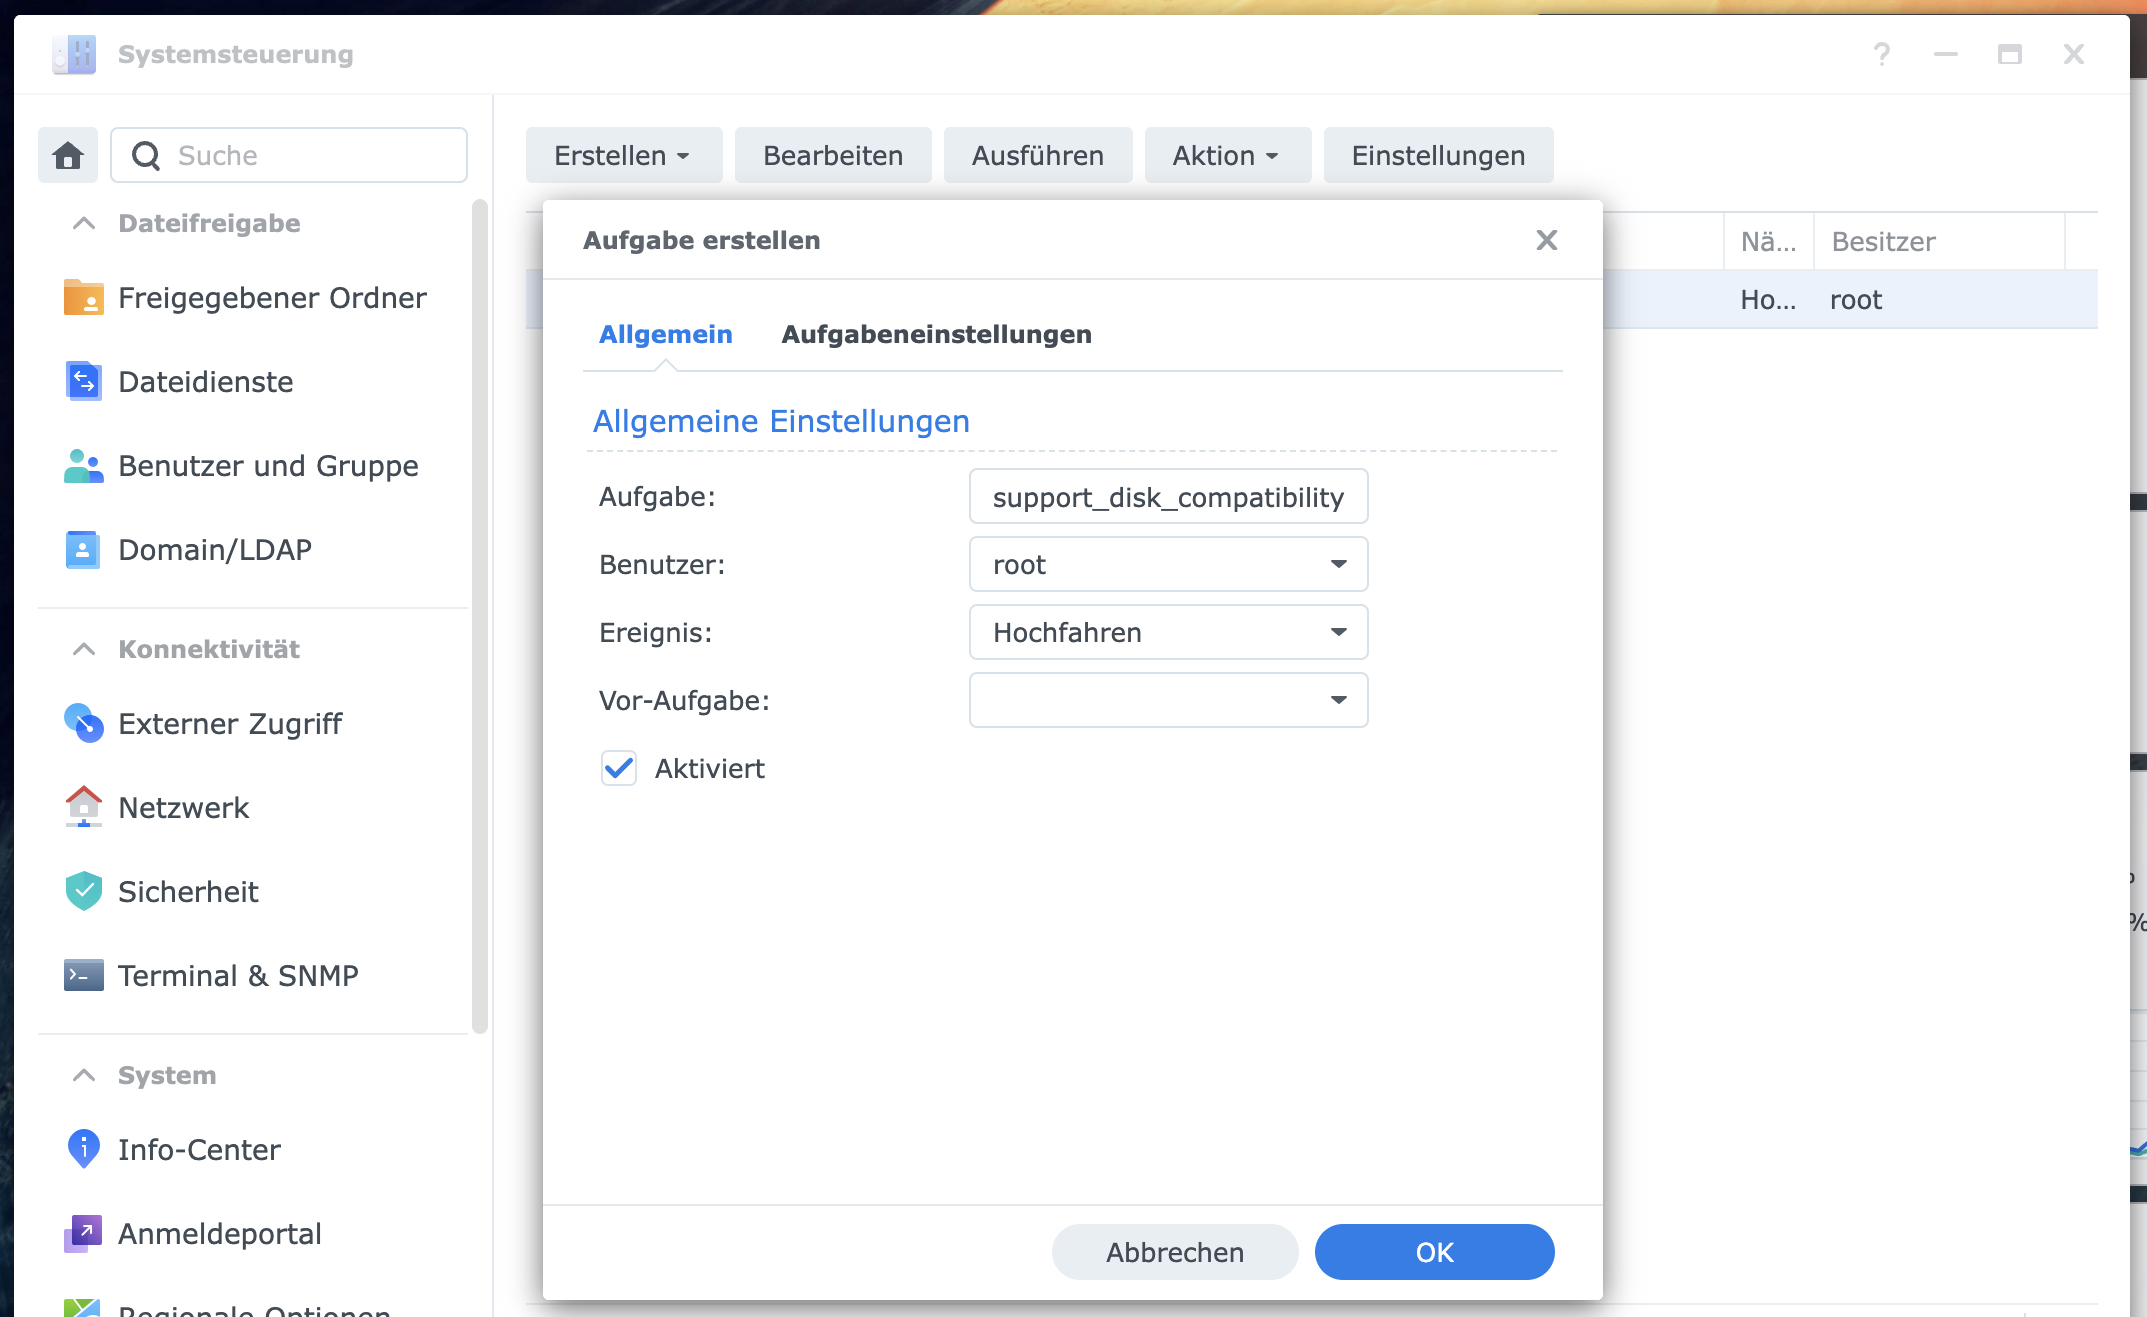
Synology resets the above parameters to «default» from time to time after new updates have been installed. To counteract this automatically, a new task can be created in the task scheduler under «Create» then «Triggered task» -> «Custom script» as follows:
The «Custom script» can be specified under «Task settings». Optionally, a notification including the output of the script can be sent to an email for each run to see which parameters have been updated.
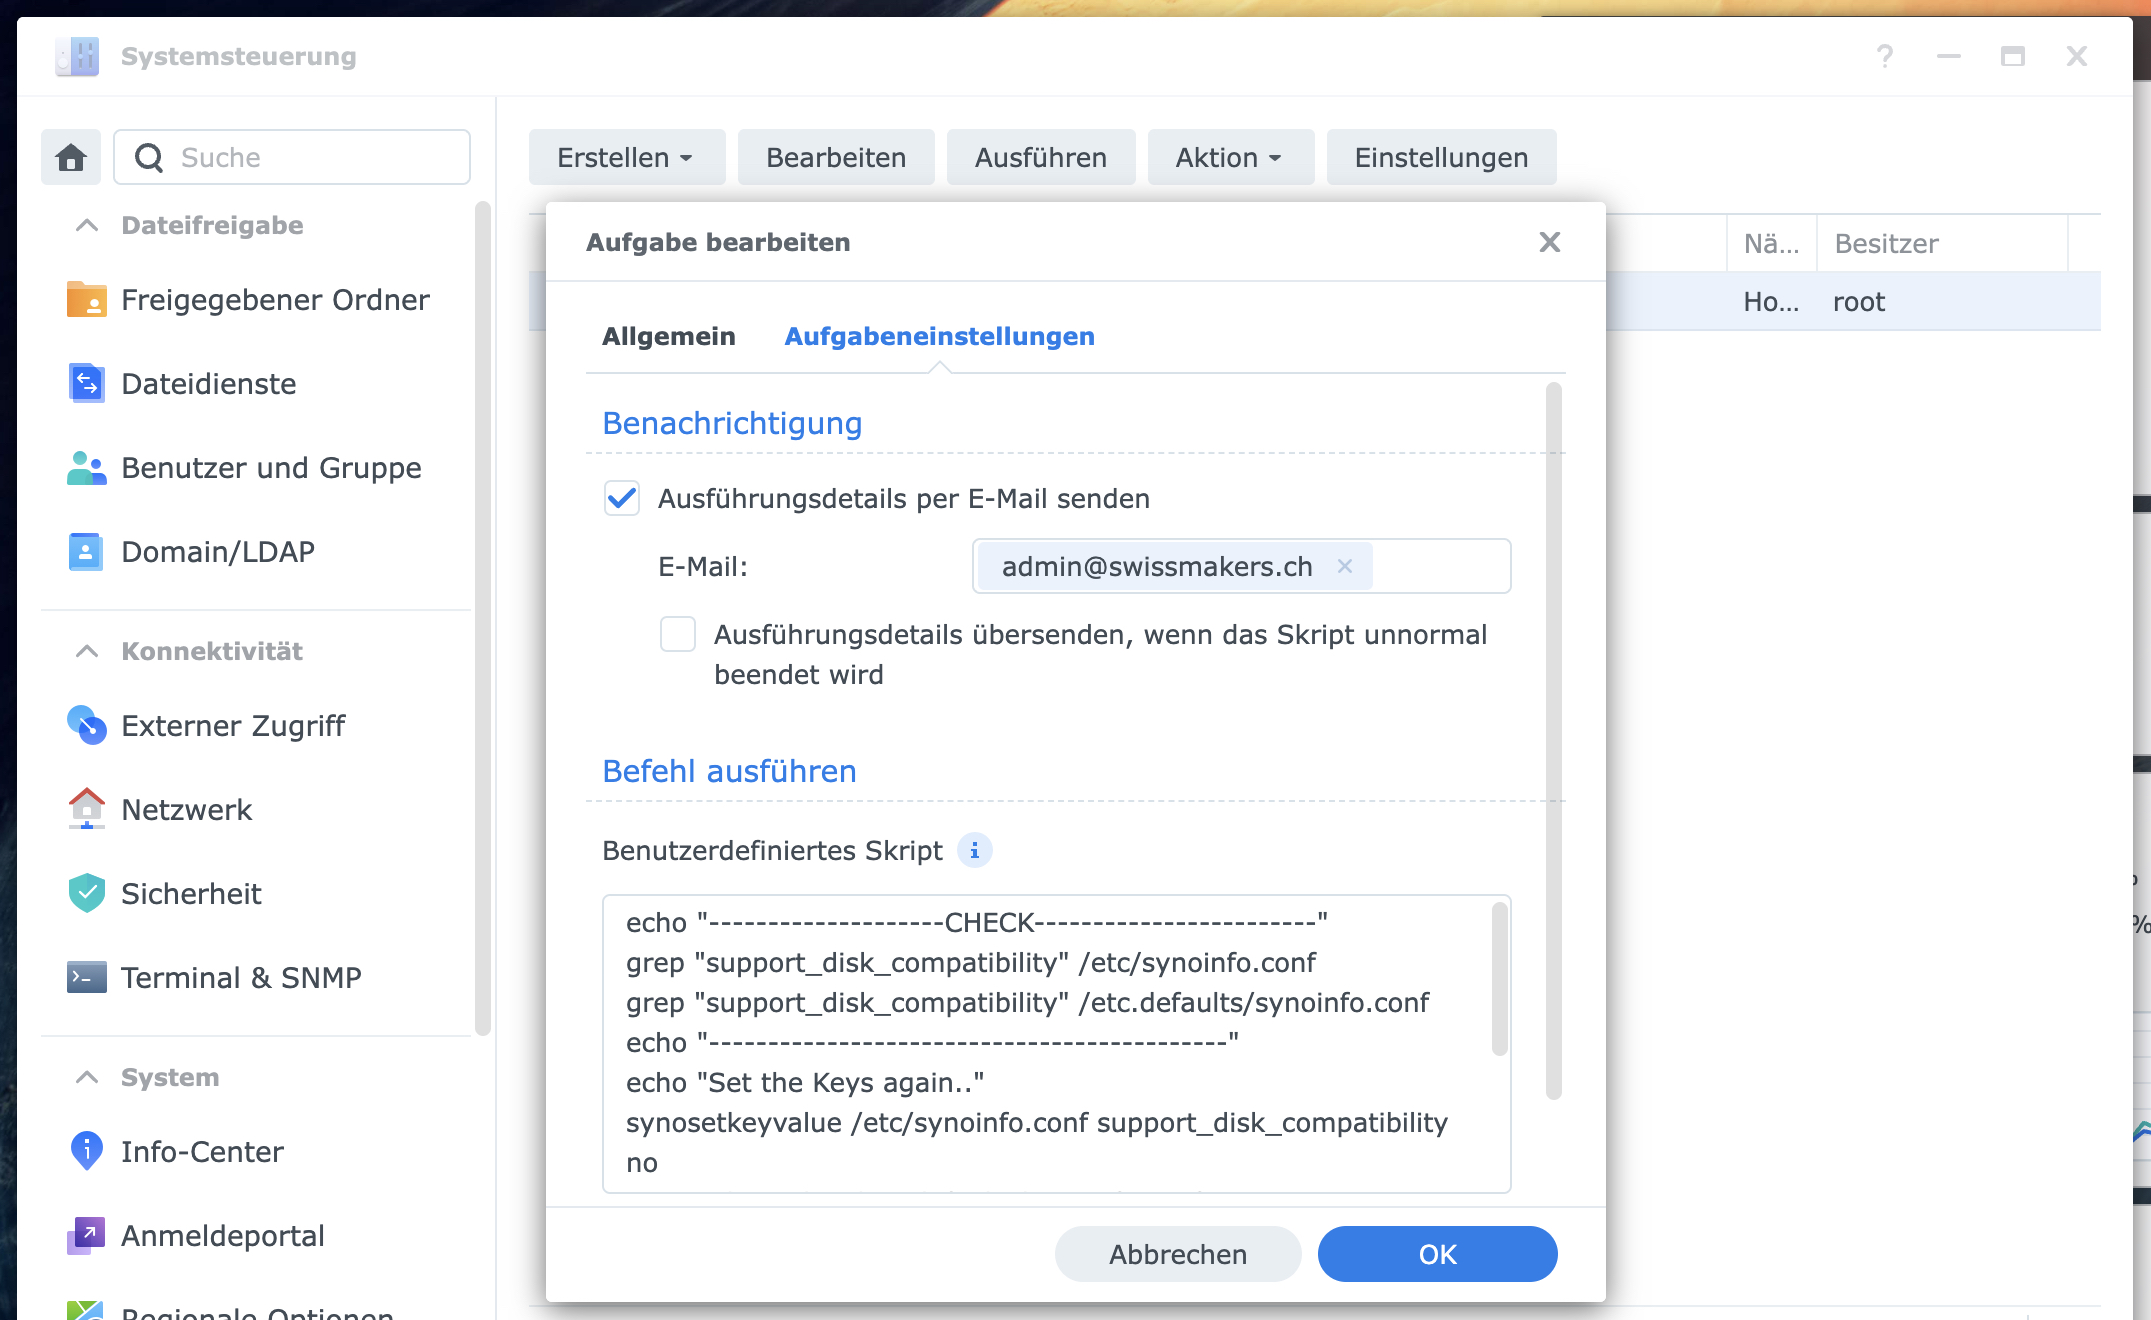
echo "--------------------CHECK------------------------"
grep "support_disk_compatibility" /etc/synoinfo.conf
grep "support_disk_compatibility" /etc.defaults/synoinfo.conf
echo "--------------------------------------------"
echo "Set the Keys again..."
synosetkeyvalue /etc/synoinfo.conf support_disk_compatibility no
synosetkeyvalue /etc.defaults/synoinfo.conf support_disk_compatibility no
echo "--------------------CHECK------------------------"
grep "support_disk_compatibility" /etc/synoinfo.conf
grep "support_disk_compatibility" /etc.defaults/synoinfo.conf
echo "--------------------------------------------"TipOnce the task has been created and saved, it can be executed manually for the first time using the «Execute» button. To update the display in the UI, the Synology should then be restarted.
Information on alternative solutions on the Internet
It is important to emphasise that on the Internet, including on Platforms like Reddit, There are various DIY solutions for the disc compatibility problem with Synology Disk Stations.
For example, one such approach is to use the Script: "syno_hdd_db.sh" (available at: https://github.com/). This script manipulates Synology's internal database to mark the existing hard drives as "own".
However, it is highly advisable here, Caution should be exercised when manipulating Synology's own databases.
The use of such scripts can unexpected consequences have like System instability, Malfunctions and Migration problems with future updates. We therefore strongly recommend that you refrain from using such scripts.
Conclusion
Our solution presented above, which is supported by the Editing the configuration files /etc/synoinfo.conf and /etc.defaults/synoinfo.conf is achieved, is is the recommended and safe method to fix the disc compatibility problem.
Our approach does not affect any internal system databases, but merely switches off the vendor disc check mechanism. This means that no internal system databases need to be changed or manipulated. This also minimises the risk of future upgrades to almost zero. Please note that Synology may undo this configuration at any time during a system update. Accordingly, the customisation would then have to be carried out again.
However, please make sure that you are always careful when making any changes to your Synology system and, if necessary, back up your data beforehand if you are not familiar with the Linux shell.